Key Takeaways :
- Yarn Choice Matters: Picking the right yarn is like picking the right flavour for your cake – it makes all the difference! Think about warmth, how it drapes, and how soft it feels. Wool, alpaca, cotton, and even cashmere – they all have their own special charm! Match your yarn weight to the pattern – it’s a must, promise!
- Patterns Aren’t Scary: Crochet patterns look like code sometimes, but they are your friend! Learn a few abbreviations, and you’ll be grand. Gauge? Yes, the swatch. Do it, and your cardi will fit like a dream!
- Simple Crochet Cardigan Pattern
(Sizes: Small, Medium, Large) - Basic Stitches are Your Superpowers: Chain (ch), slip stitch (sl st), single crochet (sc), double crochet (dc) – these are your crochet superpowers! Master these, and cardigans (and much more!) are yours for the making. Practice makes perfect, my darlings!
- Cardigans in Pieces: Cardigans are usually made in separate bits – back, fronts, sleeves – and then stitched together. Think of it like crochet Lego! Follow the pattern, step by step, and you’ll build your cardi piece by piece.
- Finishing is Fab: Weave in those yarn ends – no one wants straggly bits! Blocking? It’s like a spa day for your crochet! Buttons? They make it a proper cardigan!

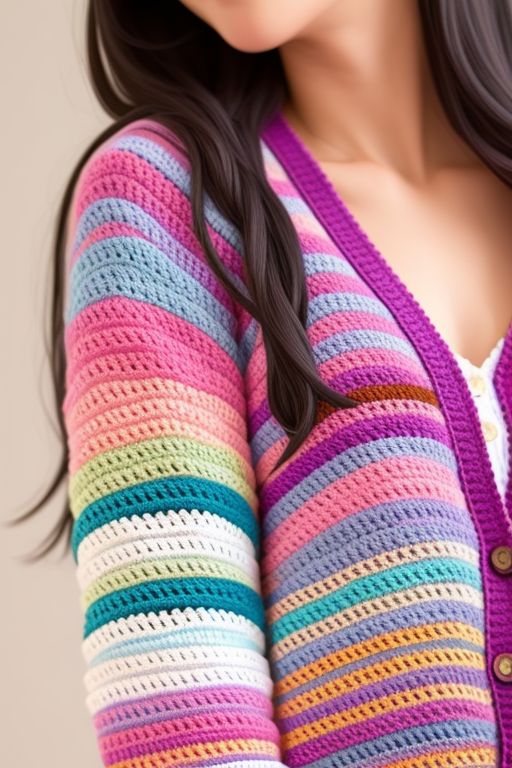
Yarn, Glorious Yarn! Picking Your Perfect Woolly Friend
Let’s talk yarn, shall we? Choosing yarn is like choosing your best friend for a project – you want one that’s going to be a joy to work with and give you lovely results. What sort of cardi are you dreaming of? Snuggly and warm? Light and breezy? Yarn choice, is key!
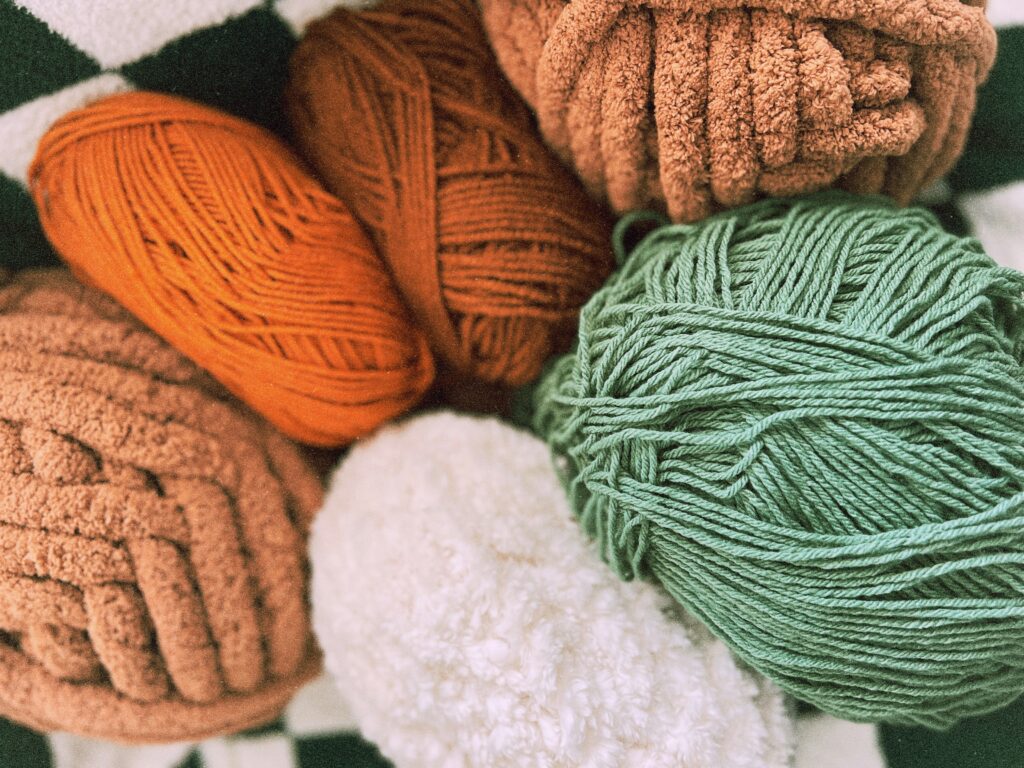
Woolly Warmth with 100% Wool Yarn: Ah, wool! You just can’t beat it for that classic, cosy cardigan feel, can you? It’s warm, it’s bouncy, and it’s just lovely to crochet with. This 100% Wool Yarn is a real go-to for a reason – it’s reliable, it feels gorgeous, and it comes in a rainbow of colours. Perfect for a snuggle-up-on-the-sofa cardi!
Alpaca Softness – Alpaca Wool Blend Yarn for extra squish: Want to ramp up the softness factor? Alpaca is your answer! Alpaca Wool Blend Yarn is just divine. It’s incredibly soft – like, seriously, stroking-it-all-day soft – and it has a beautiful drape. If you want a cardigan that feels a bit more luxurious, alpaca is the way to go. It’s a little more delicate than regular wool, mind, but the softness is just dreamy.
Cotton Coolness – Mixed Color Cotton Yarn for warmer days: Thinking of a cardigan for spring or summer? Cotton is your best friend! Mixed Color Cotton Yarn is brilliant for warmer weather because it’s breathable and light. Plus, it often comes in really vibrant, happy colours – perfect for a cheerful cardi to pop on when there’s a bit of a breeze.
Cashmere Dreams – Cashmere Cotton Yarn for a touch of posh: Ooh, cashmere! Now we’re talking a bit of luxury, aren’t we? Cashmere Cotton Yarn gives you that gorgeous cashmere softness but with a bit of added practicality from the cotton. If you fancy making a cardi that feels extra special, cashmere is just the ticket. It’s like wearing a cloud – so dreamy!
Mongolian Luxury – 100% Mongolian Cashmere Yarn – ooh la la!: Want to go full on fancy pants? Then 100% Mongolian Cashmere Yarn is where it’s at! It’s unbelievably soft – even softer than regular cashmere, if you can imagine! This is proper ‘treat yourself’ yarn, loves. Imagine a cardi in this – pure luxury, darling!
Marvellous Merino – Premium 100% Merino Wool Yarn – springy and soft: Premium 100% Merino Wool Yarn is another fabulous wool option! Merino is known for being super soft and springy, and it’s just a dream to work with. It’s a great all-rounder – warm enough for cooler days, but still lovely and soft against your skin. And it comes in such gorgeous colours too! A real winner for a cardigan project.
Plush Perfection – Wool Yarn Assorted Color Plush Thickness – chunky and quick: Want a cardigan that works up super speedily and is extra chunky and cosy? Then Wool Yarn Assorted Color Plush Thickness is your go-to! Thick and plush yarns create a really lovely textured fabric, and they are brilliant for quick projects. Perfect if you fancy a cardi in a weekend – or even an evening, if you’re speedy!
Once you’ve chosen your yarny soulmate, have a peek at the yarn label for the recommended hook size – that’s your starting point for hook selection. But we’ll chat more about hooks in a bit! For now, yarny daydreams!
Pattern Panic? Let’s Decode Crochet Patterns Together!
Right, patterns! They can look a bit like a different language at first glance, can’t they?But honestly, once you get the hang of it, they’re really not that scary at all. Think of a pattern as your crochet recipe – it tells you exactly what ingredients (yarn and hook!) and steps to follow to bake yourself a gorgeous cardigan.
Abbreviations – ch, sc, dc – what does it all mean, eh? First up, abbreviations! Crochet patterns are packed with them! ch for chain, sc for single crochet, dc for double crochet… it can feel like alphabet soup gone crochet-crazy! But don’t you worry your pretty little head! Most patterns will have a handy key at the beginning that explains all the abbreviations. Keep that key close by, and you’ll be fluent in crochet speak in no time. Honestly, you’ll be saying “dc2tog” and “inc” like it’s second nature before you know it!
Gauge – The swatch. Yes, we must do the swatch. Oh, gauge. The ‘G’ word. I know, I know, it’s not the most thrilling part of crochet, is it? But trust me, , it is essential, especially when you’re making garments like cardigans. Gauge basically tells you how many stitches and rows you get in a certain measurement – usually 4 inches or 10 centimetres. Why is it so important? Because if your gauge is different from the pattern’s gauge, your cardigan will be a different size to the pattern! And nobody wants a surprise-size cardi, do they? So, make a gauge swatch! It’s just a little square of crochet made in the stitch pattern of your cardi. Measure it, count your stitches and rows, and compare it to the pattern gauge. You might need to change your hook size to match – but it’s so worth it to get the right fit!
Choosing a Pattern – Keep it easy peasy lemon squeezy to start! If you’re new to cardigan crochet, please, please start simple ! Don’t go diving into a super complicated lace pattern with cables and bobbles for your first go! Find a pattern that’s clearly marked ‘beginner’ or ‘easy’. There are loads of free cardigan patterns online – Ravelry (external link: www.ravelry.com) is a treasure trove for finding patterns of all levels. Look for patterns that use basic stitches like single and double crochet and have a simple, straightforward shape. Build up your crochet confidence gradually – crochet is a journey, not a race !
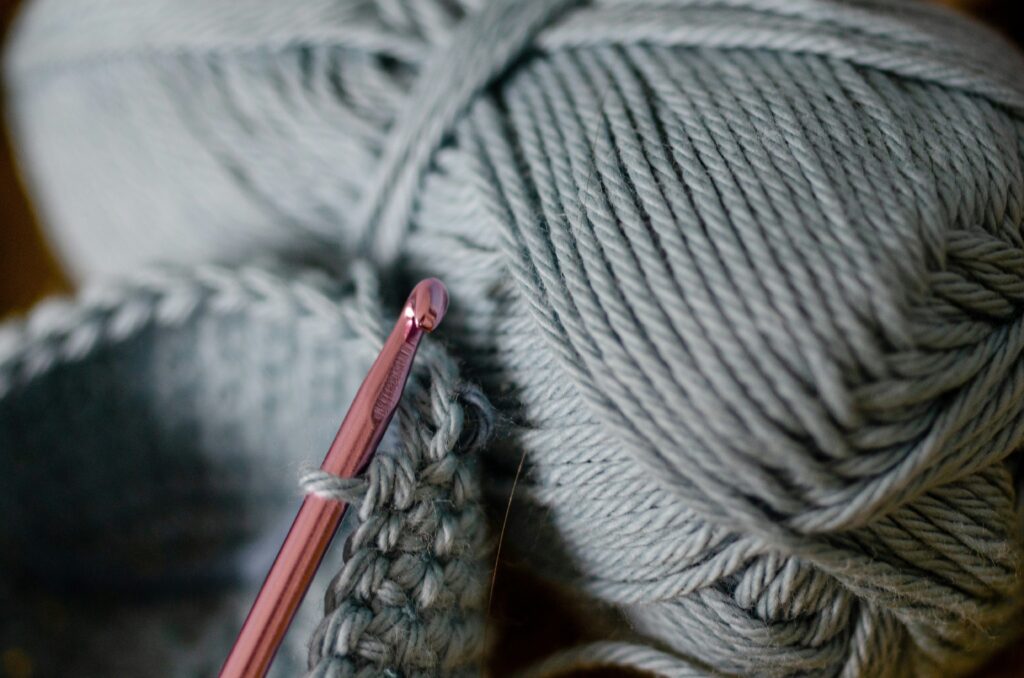
Stitch Skills 101: Your Essential Crochet Stitches
Alright, stitch time! Master a few basic stitches, and you can literally make… well, almost anything you can imagine! For a cardigan, you really only need a handful of core stitches to get you going. Let’s get stitchy and learn your crochet essentials!
Slip Knot – The very beginning of crochet magic. Every single crochet project starts with a slip knot! It’s like the magic spell that gets the whole crochet party started! Make a loop with your yarn, pop your hook in, yarn over, pull through – ta-dah! Slip knot sorted. Not too tight, not too loose – just Goldilocks perfect!
Chain Stitch – Building blocks, one chain at a time. Chain stitches are the foundation for so many crochet projects. They’re like the very first layer of bricks in a house! Yarn over your hook, pull through the loop that’s already on your hook – that’s one chain stitch! Keep going, chain after chain, until you have the number of chains your pattern tells you to make. Try to keep your chains nice and even and not too tight – it’ll make working into them much easier in the next row!
Single Crochet – Short, dense, and oh-so-versatile. Single crochet – your trusty, reliable, go-to stitch! It’s a shorter stitch, which creates a lovely dense and solid fabric. Insert your hook into the stitch (or chain), yarn over, pull up a loop (you’ll have two loops on your hook), yarn over again, and pull through both loops. One single crochet made! Repeat that across the row. Single crochet is brilliant for creating a warm, sturdy fabric – perfect for a cosy cardigan that will last.
Double Crochet – Taller, faster, and lovely for cardis! Want to get your cardigan growing a bit faster? Double crochet is your friend! It’s taller than single crochet, so it works up much quicker. Yarn over before you insert your hook, insert your hook into the stitch, yarn over, pull up a loop (now you’ll have three loops on your hook), yarn over, pull through the first two loops (two loops left on your hook), yarn over again, and pull through the remaining two loops. One double crochet done! Double crochet creates a lovely fabric that has a bit more drape than single crochet, making it gorgeous for cardigans.
Practice these four stitches – slip knot, chain, single crochet, and double crochet. Make little practice swatches. Get used to how the hook feels in your hand, how the yarn moves, and how the stitches form. Muscle memory is a real thing in crochet, – the more you practice, the easier and more natural it all becomes!
Back Panel Basics: Creating the Foundation
The back panel is usually the biggest single piece of your cardigan, and it’s often a great place to start. It’s mostly a big rectangle, which is perfect for getting into the rhythm of crochet and building up your stitch confidence!
Foundation Chain – Starting strong, with the right number of chains. Your pattern will tell you exactly how many chains you need to make for the foundation chain of your back panel. Make those chains! And then, count them! Double-count them, even! Losing count at this stage can cause all sorts of headaches later on. If you find it tricky to keep count, try using stitch markers every 20 or so chains – it can really help you keep track.
Row by Row – Turning chains and keeping those edges straight-ish! Once you’ve got your foundation chain, it’s time to start crocheting row after row! The pattern will tell you which stitch to use – for a beginner cardigan, it’s likely to be single crochet or double crochet. Work your first row of stitches into your foundation chain. When you get to the end of the row, you’ll need to ‘turn’ your work around to start crocheting back the other way. This is where turning chains come in! For single crochet, it’s usually just one chain (ch 1), and for double crochet, it’s often chain three (ch 3) – your pattern will tell you for sure. Make your turning chain, turn your work physically, and then start your next row, working back across the stitches you just made. Try your best to keep your edges as straight as you can as you go – counting your stitches at the end of each row really helps with this!
Stitch Counting – A little bit boring, but super important, loves! Yes, I know, stitch counting can feel a bit tedious, can’t it? But trust me, it’s so important, especially when you’re making pieces that need to be the right size and shape to fit together properly! Count your stitches at the end of every row, especially when you’re still getting the hang of things. If your stitch count is off, it’s much easier to fix it after just one row than after you’ve crocheted ten rows and suddenly realised something’s gone a bit wonky! If you keep your stitch count consistent and try to keep your tension even, your back panel will grow into a lovely, neat rectangle – ready and waiting for the next stage of your cardigan creation!
Front Panel Fun: Facing the Front (Literally!)
Back panel all done – hooray! Give yourself a little pat on the back! Now it’s time to move on to the front panels. Usually, you’ll make two front panels for a cardigan – a left front panel and a right front panel. They’re often mirror images of each other, and they’re what will form the opening at the front of your cardigan.
Mirror Image Panels – Left and right – almost twins! Front panels are often crocheted in a very similar way to the back panel, but they’re usually a bit narrower. You’ll start with a foundation chain, just like you did for the back, and then work rows of stitches. But do pay close attention to your pattern instructions, because sometimes the stitch pattern might be slightly different for the front panels, or there might be some shaping that starts right from the beginning. Remember, you’re making two front panels – a left one and a right one. They’re not going to be identical twins – they’re more like close cousins! One will be the mirror image of the other, especially when you get to the neckline shaping part.

Neckline Shaping – Making a nice curve for your lovely neck. Cardigans need a neckline, don’t they? Unless you’re after a super high-necked, almost-a-polo-neck cardi, which, you know, each to their own! But most cardigan patterns will include some neckline shaping on the front panels. Neckline shaping usually involves decreasing stitches at one edge of the panel to create a gentle slope or curve for the neckline. Decreasing stitches basically means working two stitches together to make them into one stitch, which narrows the row and creates that shaping. Your pattern will tell you exactly how often and where to decrease stitches to create the neckline shape. Follow those instructions carefully to get a nice, smooth, and even neckline – no wonky necklines allowed !
Buttonhole Basics – Creating holes for buttons – clever, eh? Buttons on your cardigan? Then you’ll definitely need buttonholes! Usually, buttonholes are made on one of the front panels – often the right front panel for ladies’ cardigans, but it doesn’t really massively matter which side you choose! Buttonholes are basically just little gaps or openings in your crochet fabric that buttons can fit through. They’re typically made by skipping a stitch or two in a row and then making chain stitches over the skipped stitches to create a little space. On the next row, you work stitches into the chain space to create the actual hole. Your pattern will tell you exactly how to make your buttonholes, how big they need to be, and where to place them along the button band edge of your front panel. Make sure you space them out evenly and in line with where you plan to sew your buttons on the opposite front panel – nobody wants wonky, misaligned buttons!

Sleeve Success: Arming Your Cardigan with Crochet Sleeves
Cardigan body pieces all done and dusted – fantastic! Now it’s time to move on to the sleeves! Sleeves are like the arms of your cardigan – they’re essential for keeping you warm and cosy, and for making it look like a proper, finished cardigan, rather than just a crochet waistcoat! You’ll usually need to make two sleeves for a cardigan, and you want them to be as similar as possible – think twins, not distant relatives!
Flat or Round Sleeves – Different ways to crochet those arm tubes! Sleeves for cardigans can be made in a couple of main ways – they can be crocheted flat, or they can be crocheted in the round. Flat sleeves are made in rows, just like the back and front panels. You crochet a flat piece of fabric, and then you seam it up along one edge to form a tube shape. Sleeves that are worked in the round, on the other hand, are made in continuous rounds, creating a tube shape as you crochet, with no seam needed. Your pattern will tell you which method to use. Flat sleeves are often a bit simpler for beginners to get their heads around, but sleeves worked in the round can be really satisfying to make too!
Sleeve Shaping – Wrist to shoulder – getting the shape just right. Sleeves for cardigans usually need to be shaped, don’t they? They’re generally wider at the top (where they join onto the body of the cardigan) and narrower at the wrist cuff. This shaping is usually achieved by increasing or decreasing stitches along the sleeve piece as you crochet. If you’re making flat sleeves, you’ll likely increase stitches at each end of rows to gradually widen the sleeve from the wrist up towards the shoulder. If you’re crocheting sleeves in the round, you’ll increase stitches evenly spaced around the round to widen the sleeve as you go. Again, your pattern will give you all the specific instructions for shaping your sleeves – just follow those instructions carefully, and you’ll end up with perfectly shaped arm tubes!
Matching Sleeves – Two sleeves that are actually the same! You’ve got to make two sleeves for your cardigan, and you really want them to be as similar as possible, don’t you? Try to keep your crochet tension nice and consistent when you’re making both sleeves. Count your rows and your increases or decreases carefully to make sure you’re doing exactly the same thing for both sleeves. When you’ve finished crocheting both sleeves, lay them flat on top of each other to check that they’re roughly the same size and shape. If one sleeve looks a bit wonky or noticeably different in size, it’s often worth redoing it to get a nice matching pair – nobody wants one sleeve longer than the other!

Seaming Secrets: Joining It All Up !
Body pieces done, sleeves done – fantastic work ! Now for the slightly-less-thrilling-but-still-essential bit – putting it all together and turning those flat crochet pieces into a wearable, proper cardigan! Seaming is like the construction phase of your crochet project – it’s where everything starts to come to life and take shape! Think of it like crochet Lego – you’ve made all the individual pieces, and now you’re going to join them together to build something amazing!
Shoulder Seams – Joining the top bits together. First up, shoulder seams! Lay your back panel out flat, right side facing up. Then, place your two front panels on top of the back panel, with their right sides facing down (so the right sides are facing each other). Line up the shoulder edges of the back panel and the front panels. Now, you need to seam them together along those shoulder edges. There are a few different seaming methods you can use – whip stitch, mattress stitch, slip stitch seam, single crochet seam… Your pattern might suggest a particular method, or you can just choose whichever one you prefer. Mattress stitch is often a favourite for creating almost invisible seams, but a simple whip stitch or single crochet seam works perfectly well too! Seam along the shoulder edges to join the front panels to the back panel at the shoulders.
Sleeve Setting – Putting those sleeves in the right place. Next up, it’s time to set in the sleeves! Open up the joined body pieces so they’re lying flat again. Find the centre top point of one of your sleeve pieces. Match that centre top point to the shoulder seam on your cardigan body. Now, you need to pin the sleeve head (the top, wider edge of the sleeve) all the way around the armhole edge of the body, easing it to fit as you go. You might need to gently stretch or ease the sleeve head to fit neatly into the curve of the armhole. Once it’s all pinned in place, carefully seam the sleeve head to the body armhole edge. Repeat this process for the other sleeve – sleeve setting success!
Side Seams – Closing up the sides and finishing the shape. Almost there! Now for the final seaming – the side seams and the sleeve seams. Fold your cardigan body along the shoulder seams, so it’s now inside out. Line up the side edges of the front and back panels, and then line up the underarm edges of the sleeves. Starting at the cuff of one sleeve, seam all the way up the sleeve and then continue straight down the side of the cardigan body in one continuous seam. Repeat this for the other side of the cardigan. And… ta-dah! The basic cardigan shape is now complete! Give yourself a big clap – you’ve done the main construction!

Finishing Touches: Making It Look Pro (Even If We’re Not!)
Now it’s time for those all-important finishing touches – the fiddly bits that really make your cardigan look properly polished and fabulous, even if we are all just winging it a little bit sometimes!
Weaving in Ends – – essential!
Oh, weaving in ends. Not the most glamorous part of crochet, I’ll admit, is it? But it’s so essential! Every time you started a new ball of yarn, or finished off a piece, you’ll have yarn ends dangling about. These pesky little tails need to be hidden away securely, so they don’t unravel and spoil all your hard work! Use a yarn needle (sometimes called a tapestry needle or a darning needle). Thread one of your yarn ends onto the needle and then weave the needle through the back of your stitches on the wrong side of your fabric. Go in one direction for an inch or so, then back the other way, maybe changing direction slightly as you go. Snip off the excess yarn close to the fabric. Do this for every single yarn end – yes, all of them! It takes a bit of time and patience, but it really does make all the difference to the finished look, and it stops those ends from popping out later – trust me, it’s worth the effort!
Blocking – A bit of water or steam – and magic happens!
Blocking – it sounds a bit mysterious and technical, doesn’t it? But it’s really just like ‘dressing’ or ‘grooming’ your crochet to make it look its absolute best! Blocking helps to even out your stitches, relax the yarn fibres, improve the drape of your fabric, and set the final shape and size of your cardigan. For a cardigan, blocking can make a huge difference to the overall finished look. There are two main ways to block crochet – wet blocking and steam blocking. Wet blocking involves soaking your cardigan in lukewarm water, gently squeezing out the excess water, and then laying it out flat to dry, shaping it and pinning it to the correct dimensions as it dries. Steam blocking uses a steam iron to gently steam your dry crochet piece, shaping it as you go. Bella Coco Crochet has a brilliant guide to blocking if you want to learn more and see it in action! Blocking really does make your crochet look so much more professional and polished – it’s like the magic finishing touch!

Buttons – Adding the final flourish ! Cardigan needs buttons, doesn’t it? If your pattern includes buttonholes, now is the time to sew on those buttons! Choose buttons that are the right size to fit nicely through your buttonholes, and that you like the look of with your yarn and cardigan style. Lay your cardigan out flat. Line up the button band (the edge of the front panel without the buttonholes) underneath the buttonhole band (the edge with the buttonholes). Mark the positions for your buttons by poking a pin or stitch marker through the centre of each buttonhole onto the button band underneath. Then, use a sewing needle and thread to sew your buttons on securely at those marked positions. Make sure they are aligned nicely with the buttonholes so your cardigan buttons up neatly and evenly – evenly spaced buttons just look so much neater and more professional!
Simple Crochet Cardigan Pattern
(Sizes: Small, Medium, Large)
Materials
- Yarn: 100% Wool Yarn Pack (Medium Weight/Worsted, 300g for Small, 400g for Medium, 500g for Large).
- Hook: 5.5mm (I-9) crochet hook.
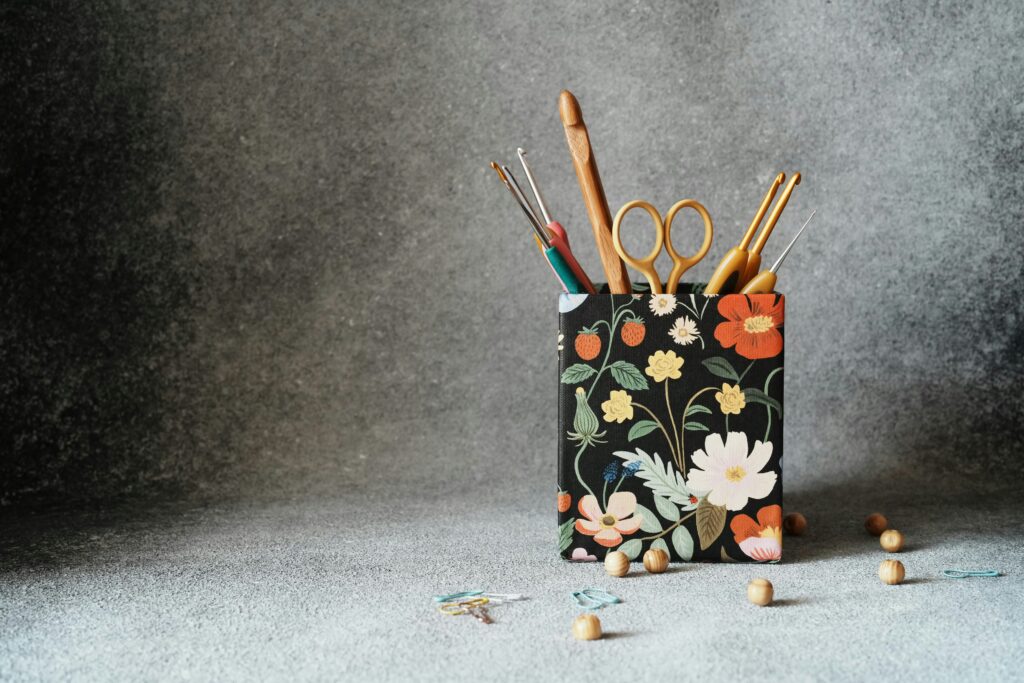
- Tools: Yarn needle, stitch markers, scissors, buttons (optional).
- Alternate Yarn: For a softer feel, use Alpaca Wool Blend Yarn.
Sizing Measurements
| Size | Bust (inches) | Length (inches) | Sleeve Length (inches) |
|---|---|---|---|
| Small | 34″ | 20″ | 17″ |
| Medium | 38″ | 22″ | 18″ |
| Large | 42″ | 24″ | 19″ |
Gauge
10cm x 10cm = 14 stitches x 8 rows in double crochet (DC).
Adjust hook size if your tension is tighter/looser.
Pattern
1. Back Panel
Stitch: Double crochet (DC).
| Size | Starting Chain | Total Rows |
|---|---|---|
| Small | 90 stitches | 50 rows |
| Medium | 100 stitches | 55 rows |
| Large | 110 stitches | 60 rows |
Steps:
- Chain the starting number.
- DC in the 3rd chain from the hook, DC across.
- Turn, chain 2 (counts as first DC), DC in each stitch.
- Repeat until you reach the total rows. Fasten off.

2. Front Panels (Make 2)
Left and Right Panels:
| Size | Starting Chain | Total Rows | Neckline Decreases |
|---|---|---|---|
| Small | 45 stitches | 50 rows | Decrease 1 stitch every other row starting at row 30 |
| Medium | 50 stitches | 55 rows | Decrease 1 stitch every other row starting at row 32 |
| Large | 55 stitches | 60 rows | Decrease 1 stitch every other row starting at row 35 |
Steps:
- Chain starting number.
- Follow the same DC pattern as the back panel.
- For neckline: At the decrease row, skip the first stitch on the side closest to the center.
- Continue decreasing until 10 stitches remain. Fasten off.

3. Sleeves (Make 2)
Stitch: DC in joined rounds.
| Size | Starting Chain | Total Rounds | Increases |
|---|---|---|---|
| Small | 40 stitches | 30 rounds | Increase 2 stitches every 5 rounds |
| Medium | 44 stitches | 32 rounds | Increase 2 stitches every 5 rounds |
| Large | 48 stitches | 34 rounds | Increase 2 stitches every 5 rounds |
Steps:
- Join chain into a ring.
- DC in each stitch around.
- Increase rounds: 2 DC in next stitch, 1 DC in each stitch until end.
- Continue until sleeve reaches desired length.

4. Assembly
- Sew Shoulders: Use the mattress stitch to join front and back panels at the shoulders (leave 6″ for neckline).
- Attach Sleeves: Pin sleeves to armholes, sew with yarn needle.
- Side Seams: Sew underarm to hem.
5. Edging
- Neckline & Front Bands:
- SC evenly around edges (1 SC per DC row).
- For buttonholes (if adding): Chain 2, skip 2 stitches every 4″.
- Cuffs & Hem:
- SC in each stitch for 3 rounds.
6. Buttons or Ties
- Attach buttons to the opposite band of buttonholes.
- For ties: Braid 3 strands of Mixed Color Crochet Yarn, sew to edges.
Customization Tips
- Add Pockets: Crochet two 6″x6″ squares, sew to front panels.
- Lengthen/Shorten: Add/remove 5 rows to the back and front panels.
- Texture: Swap DC for half-double crochet (HDC) for a denser fabric.
Frequently Asked Questions (FAQ)
Q1: How long will it really take me to crochet a cardigan?
A: Ah, the million-dollar question! It’s a bit like asking “how long is a piece of string?” really! It totally depends on loads of things – how complicated the pattern is, how thick your yarn is, how big you’re making it, and, of course, how fast you personally crochet! For a simple cardigan in a chunky yarn, it might take a confident crocheter around 20 hours. But for a more intricate pattern in a finer yarn, it could easily take well over 100 hours. Don’t rush it, loves – enjoy the crochet journey!
Q2: What’s the best type of yarn for a beginner crocheting a cardigan for the first time?
A: Worsted weight yarn is often a brilliant shout for beginners making a cardigan for the first time. It’s a lovely middle-ground yarn – not too thick and bulky, and not too thin and fiddly – so it’s nice and easy to handle. Choose a smooth yarn in a light or bright colour, as this will really help you to see your stitches clearly as you work. Acrylic yarn is a great budget-friendly option for practicing, or cotton or a simple wool yarn are also lovely to work with and will give you a gorgeous finished cardigan. Maybe avoid super fluffy or novelty yarns until you’re feeling a bit more confident in your crochet skills!
Q3: Can I actually wash my crocheted cardigan, or will it all go horribly wrong?!
A: Yes, you can usually wash your crocheted cardigan! But always check the yarn label first for specific washing instructions! Wool and other animal fibres often need to be hand-washed gently in cool water and laid flat to dry. Cotton yarn can sometimes be machine-washed on a gentle cycle. Acrylic yarn is often the most forgiving and is usually machine washable and tumble dryer friendly. Following the yarn label instructions is key to avoid any shrinking, felting, or damage to your beautiful cardigan!
Q4: Oh no! Disaster! I’ve run out of yarn halfway through my cardigan! What do I do?!
A: Oh no, yarn chicken strikes again! Don’t panic, buttercup, we can sort this! The best thing to do is to try to buy more of the exact same yarn, and ideally from the same dye lot if you possibly can. If you can’t find the same dye lot, or the yarn shop has completely run out, try to find the closest colour and weight match that you can. When you start using the new yarn, you could try alternating rows of the old and new yarn near the join to help blend any slight colour differences a little more smoothly. Or, if you’re feeling creative, you could even decide to make the cuffs, collar, or button bands in a contrasting colour using the new yarn – sometimes happy accidents can lead to lovely design features! But the best tip for avoiding yarn chicken altogether is to always buy a little bit extra yarn at the start of your project, just in case of emergencies!
Q5: Help! The edges of my cardigan pieces are all wobbly and uneven – what am I doing wrong?!
A: Wobbly or uneven edges are a super common crochet problem, especially for beginners! It’s usually caused by accidentally adding extra stitches or missing stitches at the beginning or end of your rows. The best way to combat wobbly edges is to count your stitches at the end of every row, or at least every few rows, particularly when you’re still getting the hang of things. Using stitch markers in the very first stitch and the very last stitch of each row can also be really helpful to make those edge stitches easier to spot and work into correctly. And making sure you’re doing consistent turning chains at the end of each row also helps to keep those edges nice and neat-ish!
Q6: Is there any way to make the cardigan pattern bigger or smaller? I’m not quite ‘standard’ size!
A: Yes, absolutely, you can usually adjust a crochet cardigan pattern to make it bigger or smaller! But it does take a little bit of crochet maths and know-how! For small adjustments, you could try using a slightly larger or smaller crochet hook than the pattern recommends – just make sure you check your gauge swatch carefully to see how this affects the size of your stitches. For bigger size changes, you’d generally need to adjust the number of starting chains and the number of rows in each piece, and you’d also need to adjust any shaping instructions accordingly to keep the proportions right. This is a bit more advanced, so if you’re a beginner, it’s often easier to try and find a pattern that’s already written in a size that’s close to what you need, or to choose a pattern that includes instructions for multiple sizes.
Q7: What’s even the difference between crochet and knitting anyway? They both use yarn, don’t they?!
A: Yes, they both use yarn, but crochet and knitting are actually quite different crafts! Crochet uses just one hook to create stitches, whereas knitting uses two needles. In crochet, you work one stitch at a time, and each stitch is completed before you start the next one. In knitting, you have lots of ‘live’ loops on your needles all at once, and you create new rows of stitches by passing loops from one needle to the other. The fabrics created by crochet and knitting also look and behave quite differently – crochet fabric tends to be denser and less stretchy than knitted fabric. Both crafts are absolutely brilliant for making cosy cardigans (and all sorts of other amazing things!), but this particular guide has been all about the wonderful world of crochet, of course!

And there you have it, my gorgeous crochet friends! Your very own stylish crocheted cardigan is now complete! Give it a final once-over, admire your handiwork in the mirror, and then… go forth and wear it with pride, my loves! You made that! With just a hook and some string – amazing, isn’t it?